|
Image Resize (Optimize) |


|
|
Image Resize (Optimize) |
|
Although it's possible to resize pictures directly on label (by dragging black square handles), internally, software still keeps original image. This way it ensures that best possible quality will be used while printing label. If you put extremely large picture to the label (for example, scanned high resolution image), sometimes it will use too much computer memory and reduce performance. In this case it would be advisable to internally resize image to improve memory usage while keeping same quality of printouts.
Another possible use of this option is to change size of one tile in case when Tiled option is used.
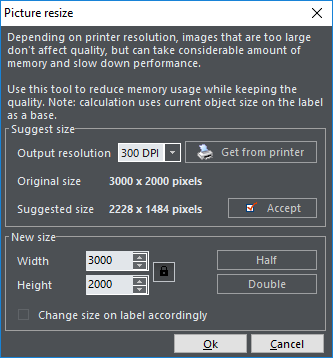
Suggest size |
|
Output resolution |
Choose desired DPI resolution (Dots Per Inch). Note that you can (and it's usually recommended) set smaller resolution than maximum printer resolution. While printing, images are resized by using optimized algorithm that assures maximum quality. For example, if your printer's resolution is 600 DPI, you can safely set this value to 300 DPI. In this case, image will use approximately 1/4 of memory than 600 DPI image, but you probably won't be able to notice any loss of printout quality. |
Get from printer |
Get default printer resolution |
Original size |
Original image size |
Suggested size |
Suggested new size for the image (based on DPI setting above and original size) |
Accept |
Accept suggested size. When clicked, suggested size will be transferred to New size values. |
New size |
|
Width |
New image width |
Height |
New image height |
Lock |
Lock aspect ratio, to prevent image deformation |
Half / Double |
Set the new size to half / double of the current size |
Change size on label |
When checked, image boundaries on the label will be adjusted |
See also