|
Print dialog and print layouts |


|
|
Print dialog and print layouts |
|
Note: You can view general information about print layouts in the introductory topic.
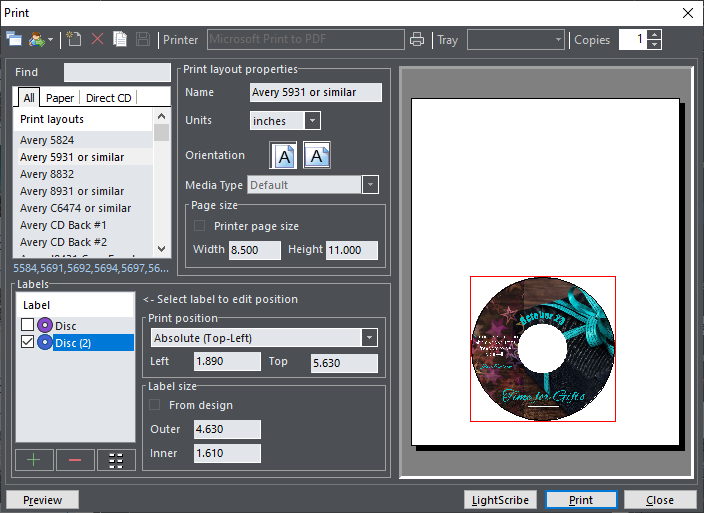
When you choose Print option, window similar to this will appear.
Toolbar
|
Compact |
Turn on and off compact dialog. Compact dialog doesn't contain editing options, just print layout list and simple preview. |
|
Exchange |
Exchange layouts with others |
|
Import from file |
Import XML file from the disk |
|
Import from URL |
Import XML file from the WWW (note: proxy settings must be configured) |
|
Export to file |
Export layout to XML file |
|
New |
Create new print layout |
|
Delete |
Delete currently selected print layout |
|
Copy layout |
Create a copy of selected layout for further editing |
|
Save |
Save currently selected print layout |
|
Printer Setup |
Choose printer and its options |
|
Tray |
Select paper source tray (bin) to use |
|
Copies |
Number of copies to print |
Print layouts
This is a list of installed print layouts. Create, delete and edit layouts and choose the layout you want to be printed.
Print layout properties
Edit layout properties.
| ▪ | Name |
| ▪ | Units |
| ▪ | Orientation |
| ▪ | Media Type (select disc or type of paper) |
| ▪ | Printer page size (if this option is on, page setup will be retrieved from the selected printer) |
| ▪ | Custom page size (if Printer page size is off, here you can edit custom paper size) |
Labels
In this area you can add (+) or delete (-) individual labels and define their positions. Position can be Absolute (Top-Left), Aligned to other label or Absolute (Center). If you choose absolute (top-left) position, you should enter distance of label from left and top edges of paper. Similarly, if you choose absolute (center) position, you should enter position of center of label. This is particularly useful when label size is set to From design. In that case, center of label will remain same regardless of size.
If you select aligned position, you will be able to select other label to align with. In this case, if you change position of one label, the other will be moved automatically.
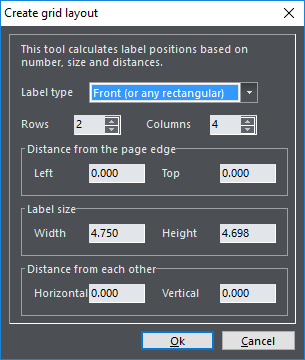
Additionally, you can use a ![]() button to easily create a grid-like layout. Just define number of rows and columns, distances from paper edges and from each other, and software will automatically create a complete layout for you.
button to easily create a grid-like layout. Just define number of rows and columns, distances from paper edges and from each other, and software will automatically create a complete layout for you.
Before printing, use check boxes next to label names to turn off labels that you don't want to be printed this time.
Simple preview
Here you can see rough sample of printout. To see high quality preview click on Preview button.
LightScribe
By clicking on the LightScribe button, instead to the printer, your design will be sent to a LightScribe compatible device (if present on the system).
See also